How to use Facebook Ads for beginners
Summarize this article via
If you are new to the digital advertising universe you might be thinking that Facebook’s Ads are witchcraft. However, this is why here at Sociality.io we’ve prepared this guide for you. We will show you how to launch ads from scratch without any previous experience with Facebook Ads. Open this article and Facebook Ad Manager at the same time and simply follow each step. Becoming a master of Facebook ads is not rocket science, but you definitely can turn into a Jedi of reaching your social media marketing goals.
These are the steps for Facebook Ads Creation:
Step 0. Preparation
Speaking of which… Determine your goals. What are you planning to achieve with Facebook ads? Do you want to increase application downloads, boost website traffic or build a strong community on Facebook itself? The success of your Facebook advertising campaign will depend on this step.
However, don’t be misled by your assumptions. How to know exactly what objectives going to benefit the growth of your company the most? For example, as a new company, you might want to reach as many people as possible. Or increase catalog sales by advertising catalog items via Facebook ads.
First of all, listen to your current audience. Who are these new customers you are trying to reach via Facebook? Imagine these people and create a complete profile. What they like, dislike, enjoy doing, occupation, demographic factors, etc. The more you understand these potential clients the more successful is your campaign going to be.
And lastly, prepare copywriting and visuals beforehand. If you are investing money in digital advertising it makes sense to invest money by hiring a freelance graphic designer or copywriter to increase the success chances of your campaigns. Also, make sure that the size of files is correct and avoid being too wordy. People on the internet tend to have a short attention span. (As you probably know, since you are scanning this article yourself).
Step 1. Objective
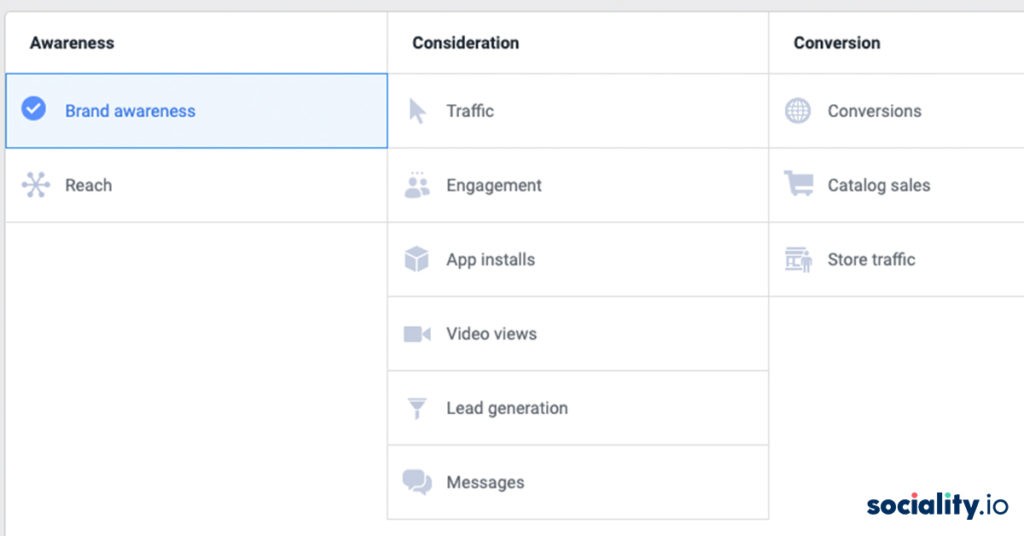
“What is the most important outcome I want from this as?”. We don’t recommend you to choose objectives randomly. By choosing a certain objective, you tell the algorithm to encourage ad viewers to perform specific targeted actions. Here is what we mean by that:
- Brand awareness – helps to increase the brand recognition of your company, reaching people who are more likely to be interested in the ad.
- Reach – show ads to the largest number of Facebook and Instagram users to attract attention to the brand. This goal does not guarantee a high rate of final target actions. The idea here is to show the ad to as many people as possible.
- App Installs – allows you to redirect users to the store to download the application.
- Traffic – encourages and redirect users to your website, blog, app or messenger conversions.
- Lead Generation – collects contact details of users within the platform.
- Messages – invites users to exchange messages. You can answer questions and showcase our superior customer support teams’.
- Engagement – increases user interaction with a particular post to get comments, likes, shares, event responses. Helps with the promotion of pages and events on Facebook.
- Video Views – promotes video content, enhances brand awareness.
- Conversions – helps to get valuable actions on the site.
- Store Visits – suitable for promoting offline stores, with this purpose you can attract people nearby your store.
- Catalog Sales – promotion of goods from your facebook catalog.
Step 2. Go to the Ads Manager dashboard:
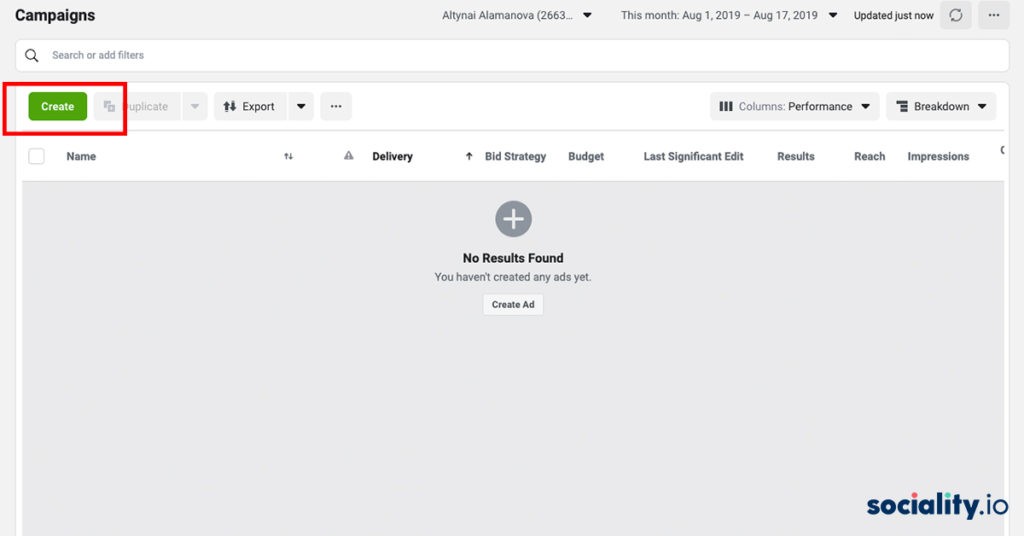
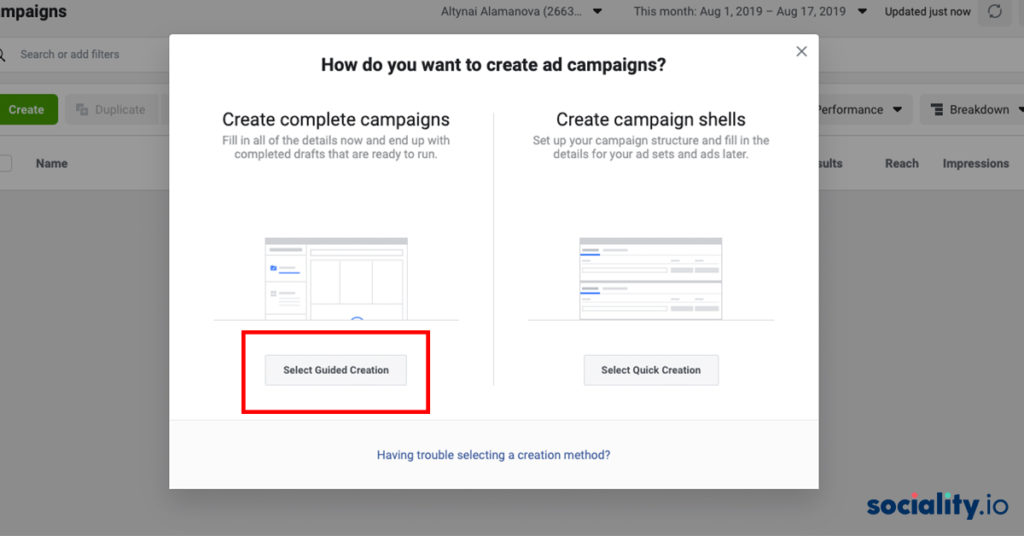
After you click “Create” Facebook offers two options: create a fully finished draft campaign step by step or create campaign shells & add ad sets and ads later. Since we are new here, it’s better to take a step-by-step method. So, click on the first one.
Choose a suitable promotion goal based on the characteristics we talked about in step 1.
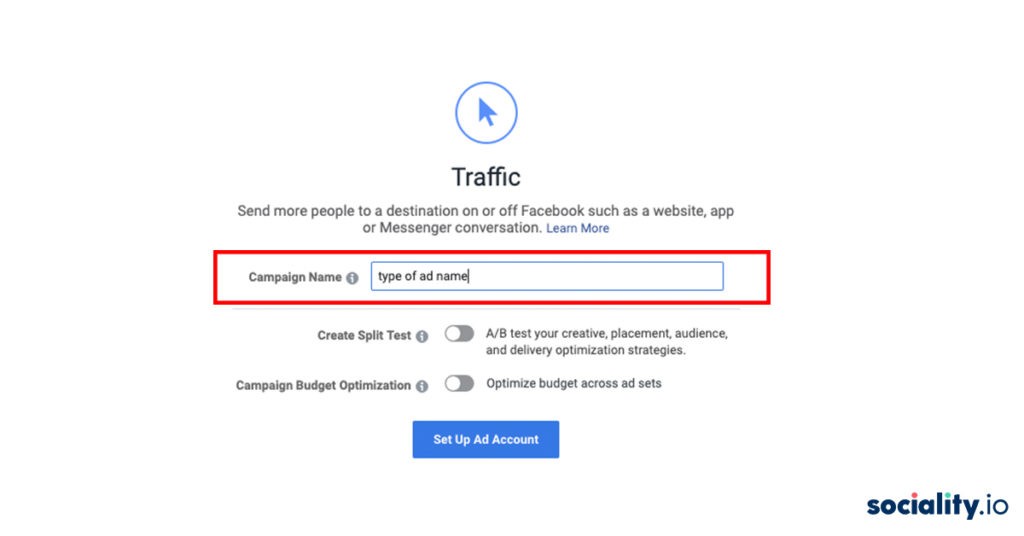
Type your ad name and click “Set Up Ad Account”.
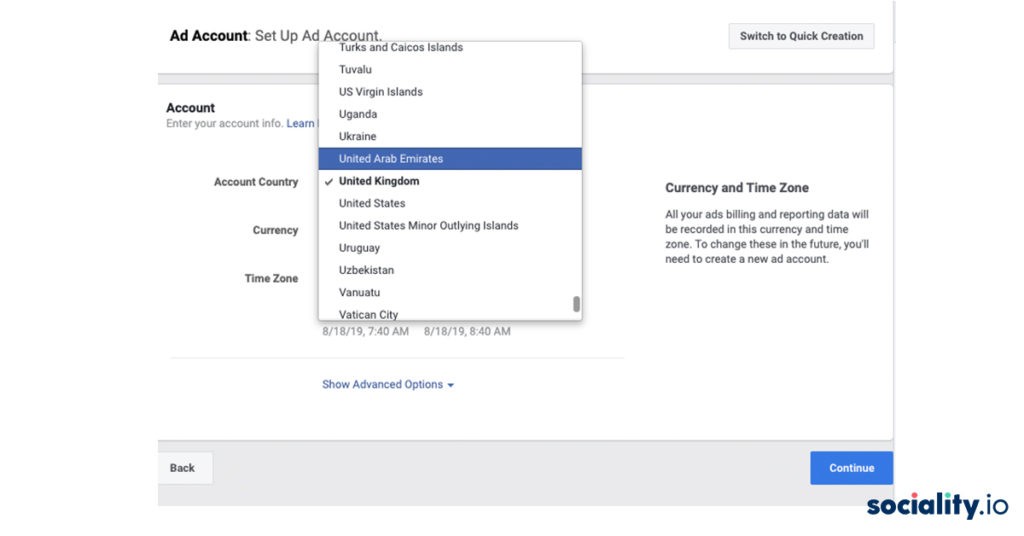
Choose a country, currency, and a suitable time zone and click “Continue”:
We are slowly moving on to the main part of this article. The next step is to set the Ad set. Set a name for the ad group and choose where the ad will lead. Since we’ve chosen our objective to be “Traffic” Facebook wants us to specify where we want the traffic to drive: website, app, messenger, WhatsApp.
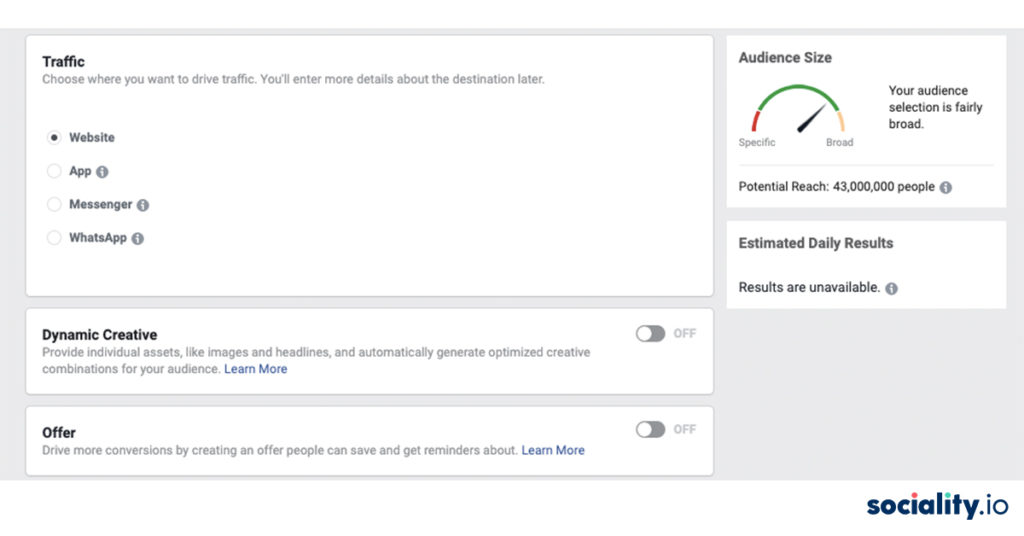
Dynamic Creative: you can learn more about dynamic creative here. Basically, Dynamic creative accepts the basic components of a Facebook ad (image, video, title, description, etc) and automatically generates optimized ad combinations based on these components.
Offer: You can use the Offer function to give your users a discount on Facebook. To do this, you must be the administrator or editor of the page on whose behalf the proposal will be submitted. (This is why social media marketing agencies ask for administrator permission to set up ad campaigns.)
Related article: How to use Facebook Debugger
Step 3. Target audience settings
At the initial stage, we recommend manually setting up the audience according to the description that was determined at the preparatory stage. In the future, you can create similar audiences according to the recommendations of Facebook.
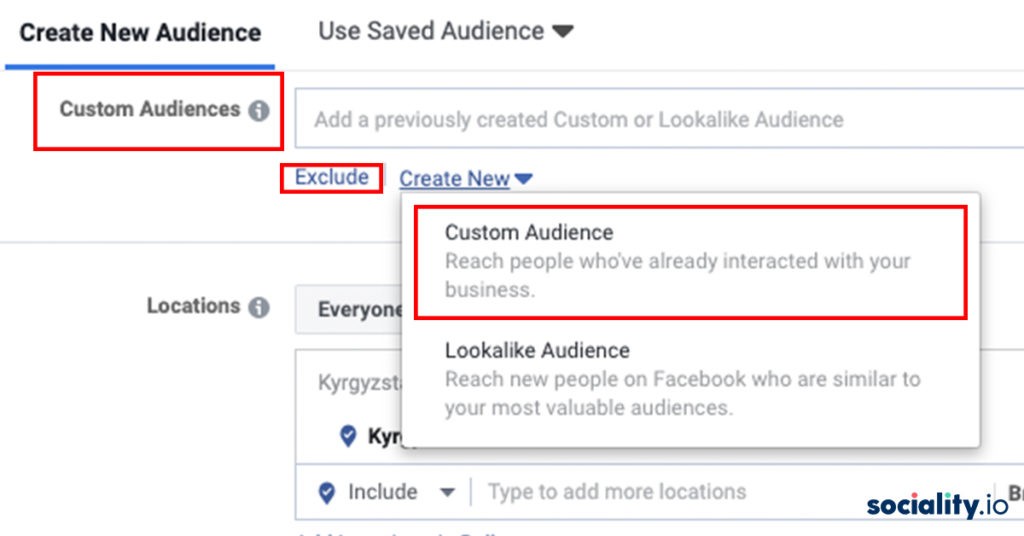
In the “Location” field, you can select all people, or select only local residents, recent visitors, or travelers of certain geographical regions. After we can further specify the location by selecting the regions or cities for which we want to show ads. You can either type the location name or mark it with a pin on the map. In this case, you can exclude some regions that you don’t want to reach.
Choose the age of the target audience. You could experiment by segmenting the audience by age. You can do several campaigns, for example, in increments of 5 years. This will help to optimize advertising campaigns more effectively because of different ages – different behaviors and perceptions. And you will also understand your target audience better.
For companies, who sell tangible products you can try to experiment by creating two campaigns based on gender. So you can understand what gender is more likely to be your ideal customer.
Languages. If we need people who speak a language that is primary in the selected region, then the field can be left blank. However, if you are targeting Hindu speaking population in London then you can specify it here.
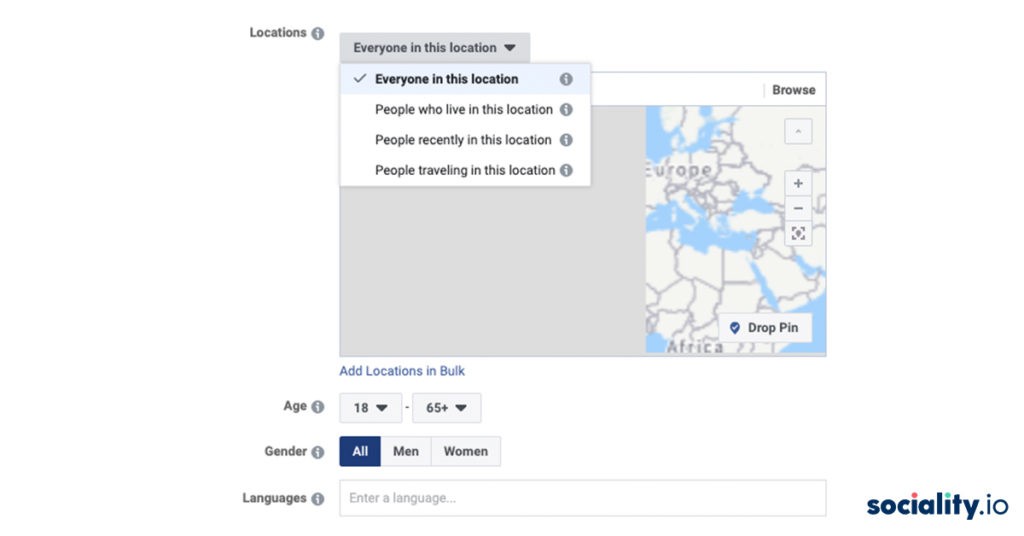
When the socio-demographic parameters are determined, we proceed to the setting of detailed targeting. On Facebook, all interests, occupation, behavior, and other parameters are collected in the Detailed targeting field. It’s enough to start entering a suitable parameter, and Facebook will show recommendations.
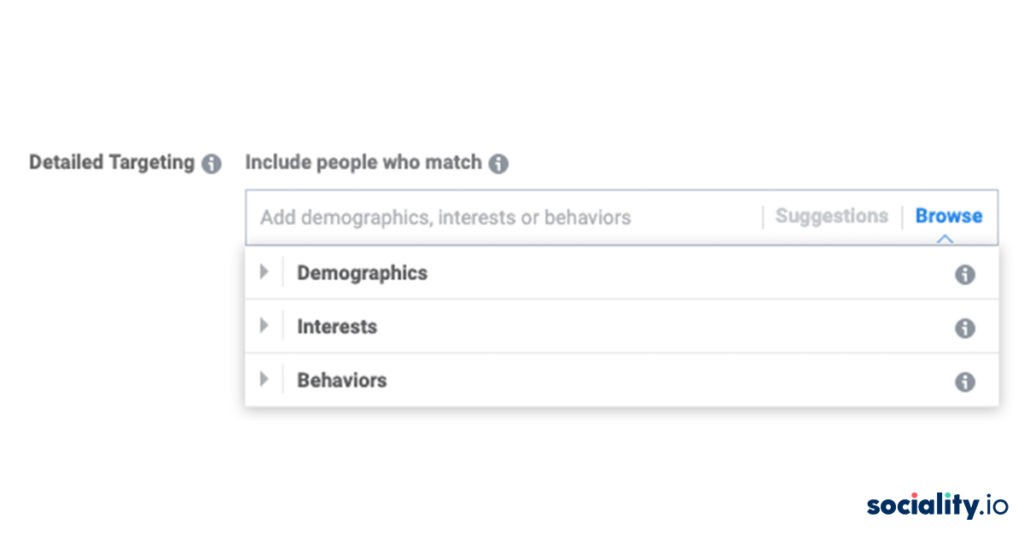
“Suggestions” button is very convenient and helps to choose the most suitable settings for a potential advertising audience. By testing different areas of interest in separate ad groups you can experiment on the effectiveness of customer segments.
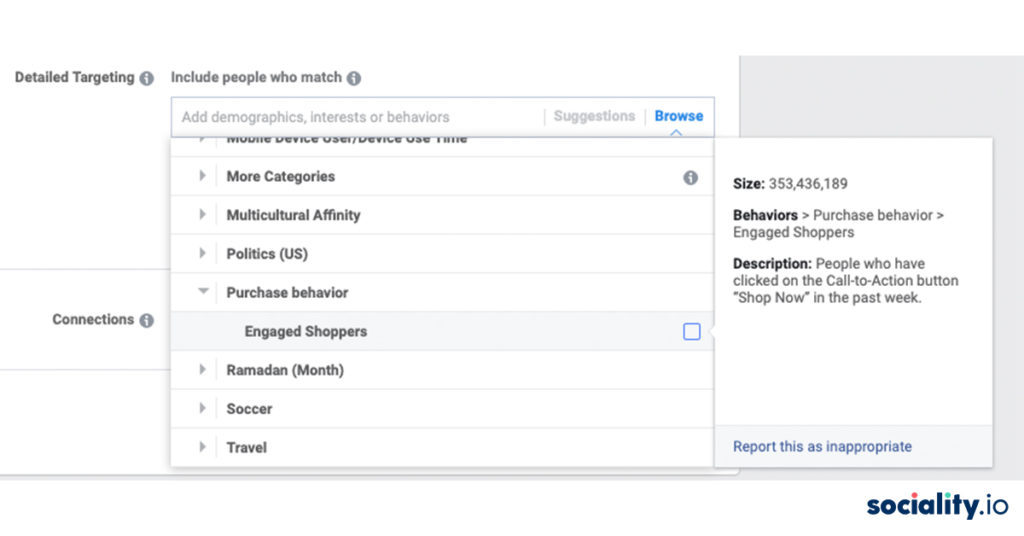
Also, you can exclude users from detailed targeting. For example, you don’t want to target people without higher education or interests in sports you can do it.
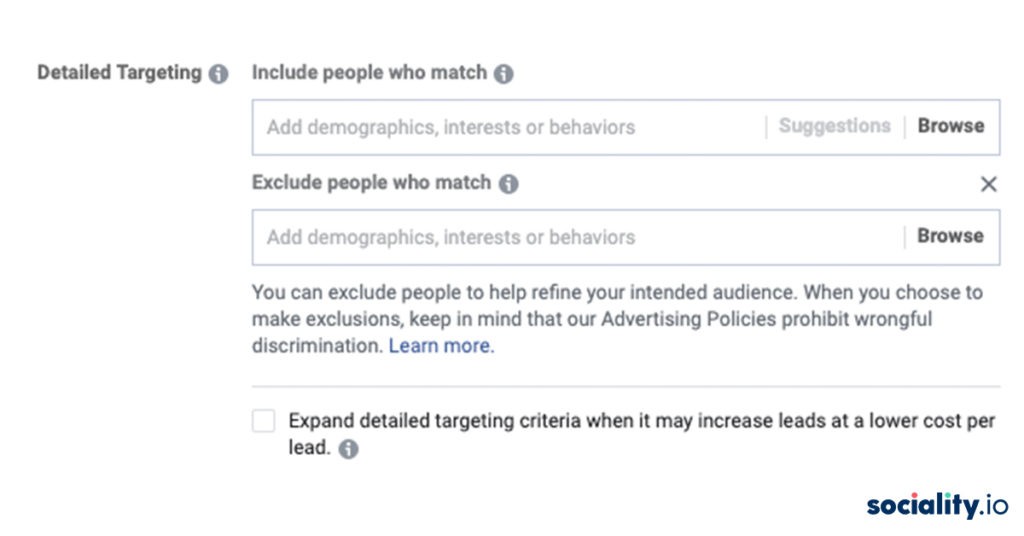
Basically, you can almost niche your advertising to people who for example have already interacted with your page, application, or have attended your events.
After you have configured all the parameters of the target audience save the segment for future advertising campaigns.
Step 4. Placement Types
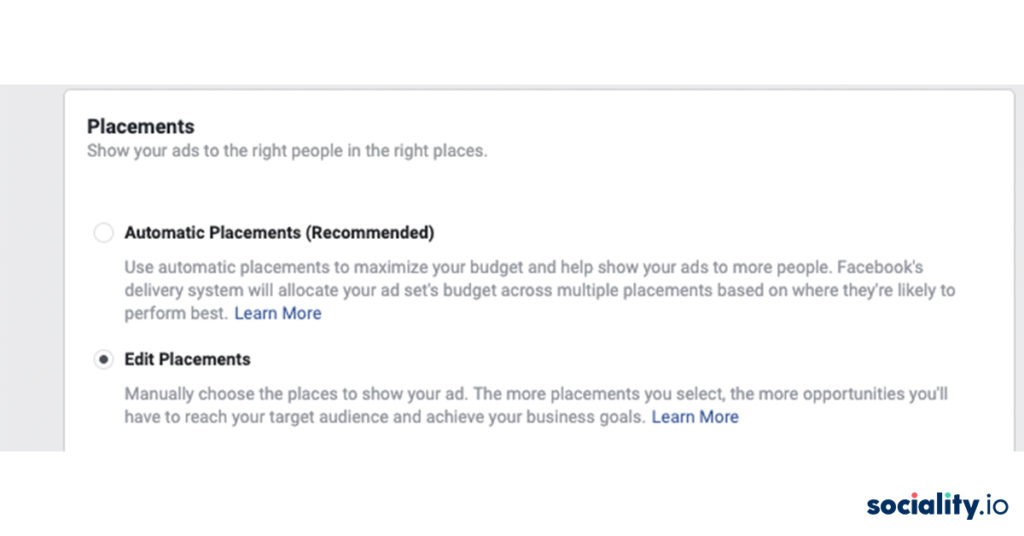
You have probably guessed it right. Placements are the placement of ads. Since the acquisition of Instagram Facebook offers different kinds of places where your ads can appear.
You can choose Facebook automatic placement. But at Sociality.io we believe in full control over where you want to display ads. For example, some placements are less effective than others and maybe are not suitable for your needs.
My personal favorite is Instagram stories and we even have a separate article dedicated to this topic. 🙂 For example, check out this Netflix stories ad that is simply genius.
Related article: How to use Instagram stories for getting more customers for your business?
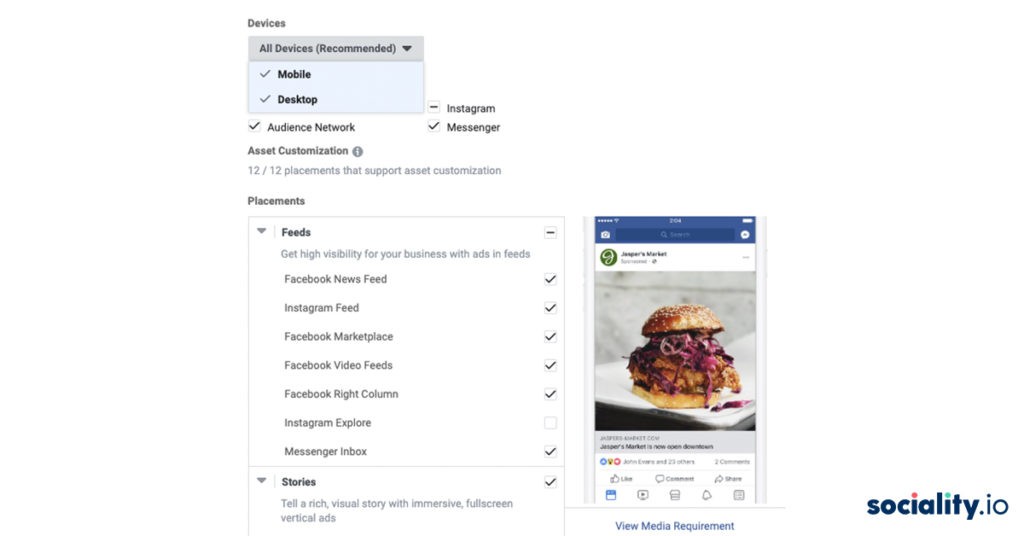
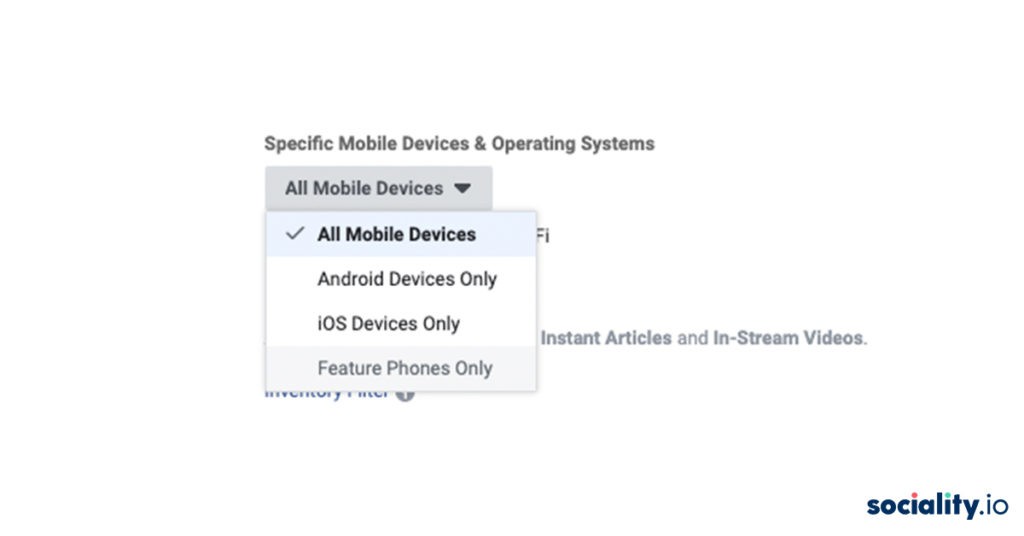
You can also select the type of device: PC, mobile, or all at once. Mobile device users can be further distinguished by operating systems: Android or iOS devices.
Step 5. Budget and Schedule
The beauty of digital advertising is that you can spend as little or as much as you want. So, you not only show Facebook ads to a very targeted audience but also control scheduling and budgets.
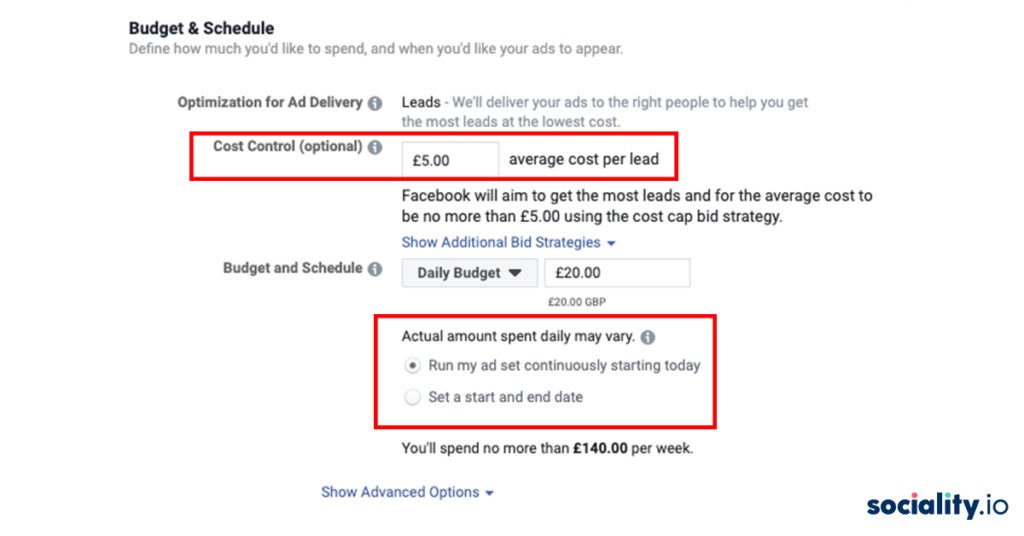
The budget can be set daily or immediately for the entire campaign duration. At the same time, with the daily budget, the actual amount of expenses may be slightly more or less than what you set. It is because the algorithm aims to display ads as effectively as possible and sometimes it requires extra dollars.
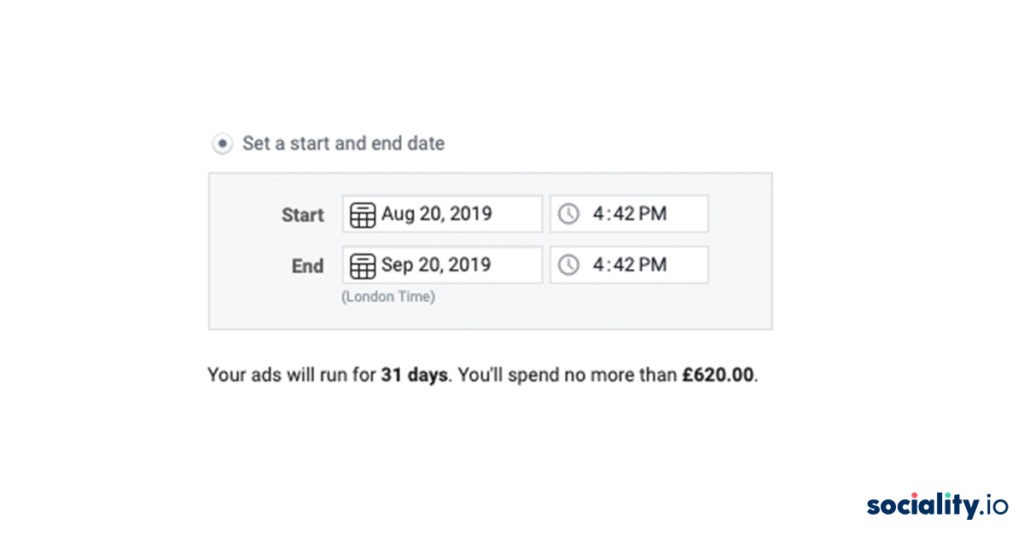
When setting a budget for the entire duration of the advertisement, you will be offered to select the desired dates and schedule ads:
Next, select the Optimization option to display ads. The selected option tells the system what result it should receive through advertising. For example, if you select “Link clicks”, Facebook will display your ad so that you get the maximum number of click links within your budget.
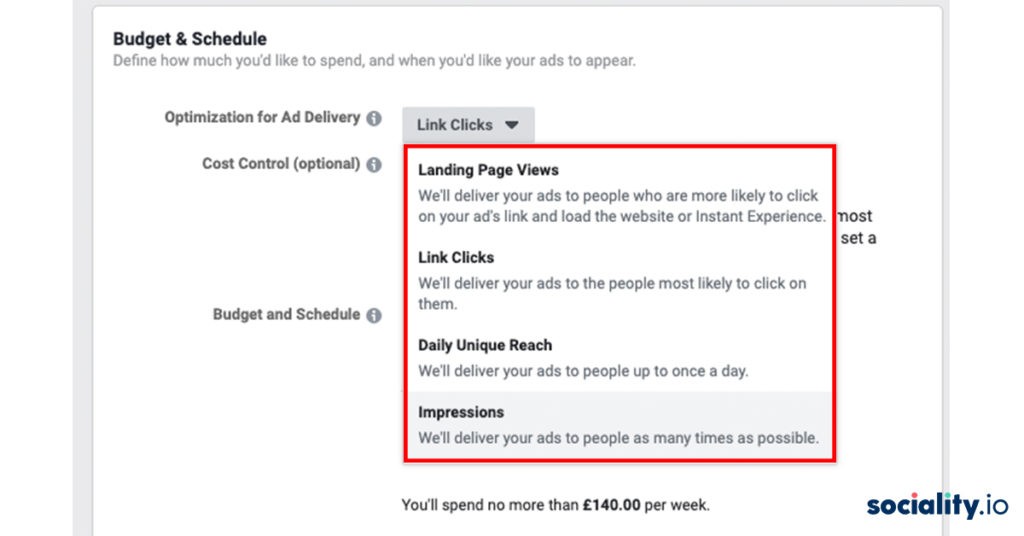
4 optimization options are offered:
- Link clicks
- Landing page views
- Impressions
- Daily reach among unique users
The choice will depend on your original advertising campaign objective.
You can learn more about cost control here.
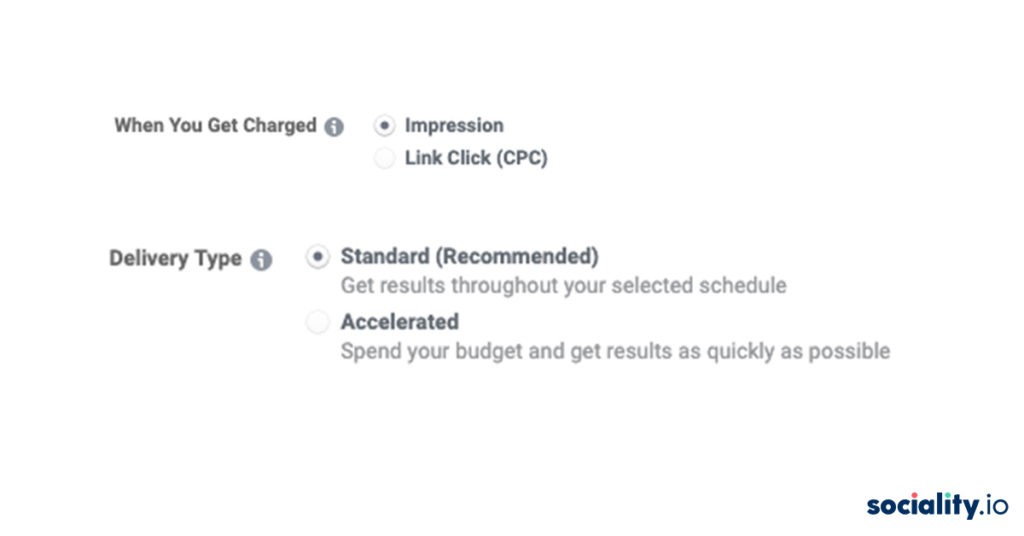
Facebook’s payment models are standard: for impressions (CPM) or for clicks (CPM). If advertising needs to be shown on a schedule, for example, only on weekdays from 9 to 18, then you can set the appropriate settings in the “Schedule an ad schedule” field.
Delivery type – a parameter that determines how fast your ad should appear. You can use standard mode, or set accelerated impressions to get results faster.
Step 6. Now we are moving to the last part. Creating ads! Finally!
Choose a format that suits the purpose of your advertising’s objective the most. For example, if you want to sell products from a catalog – then a carousel is the best format. In contrast, if you have a promotion video you would like to showcase then a single image or video is the best choice.
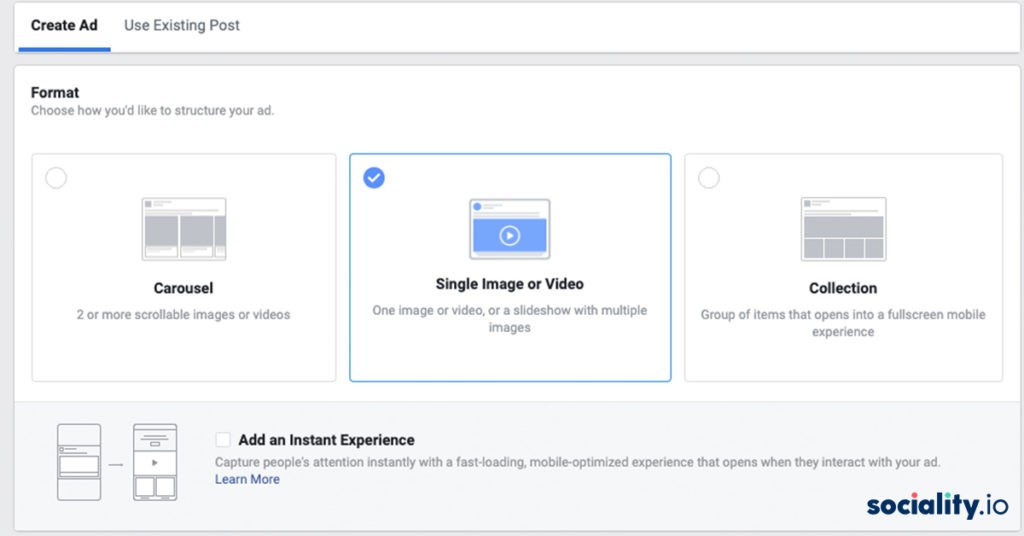
The most effective formats are “Single image or video” and “Carousel”.
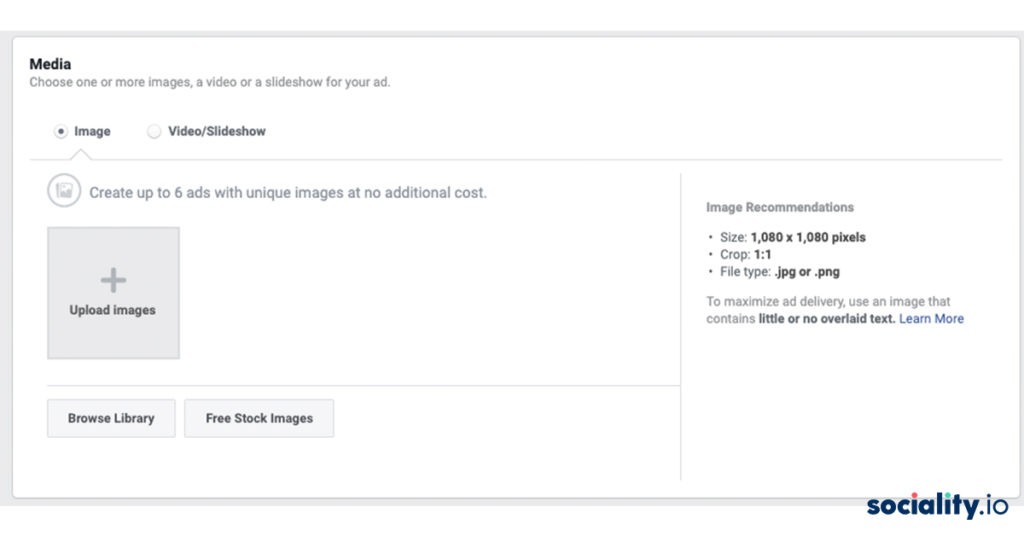
For example, if you choose a single image or video follow the following steps:
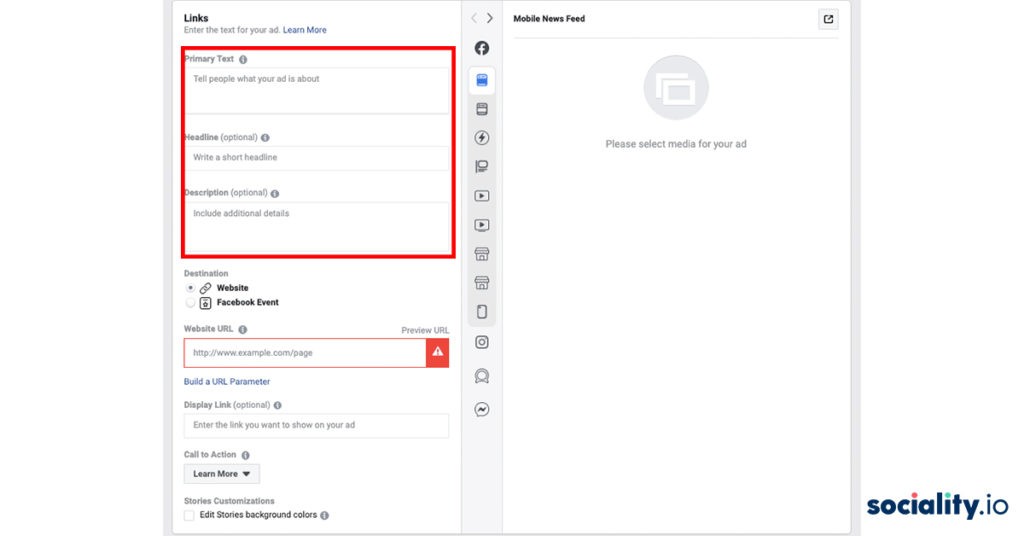
1. Fill in the headline, primary text, description, and website link.
2. Select the call-to-action button: apply now, book now, contact us, download, get a quote, get showtimes and listen now.
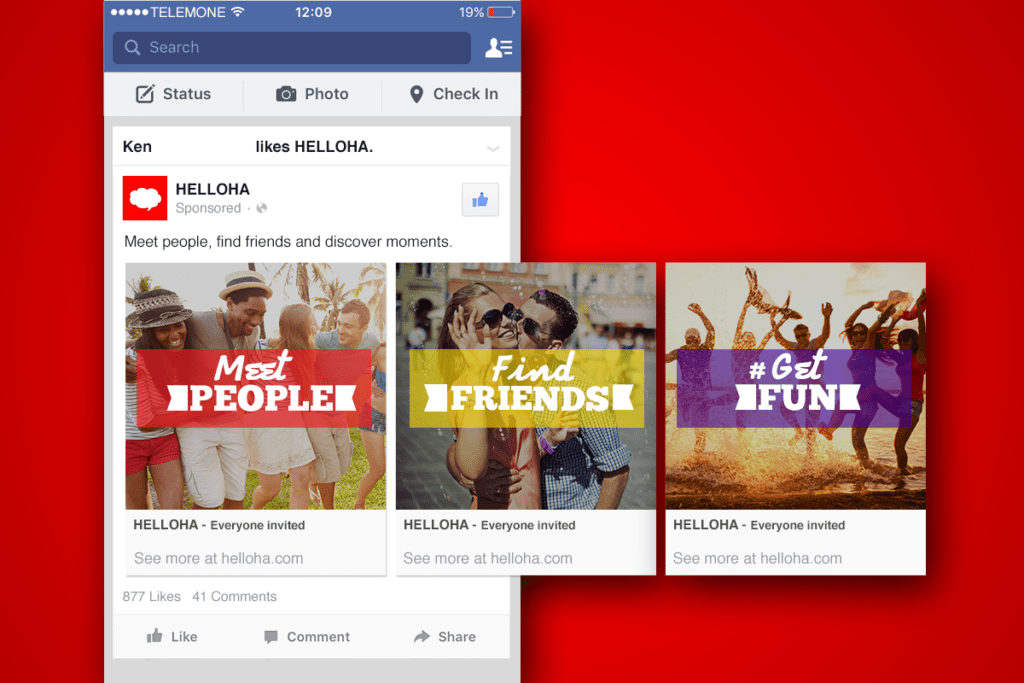
If you want to choose a carousel format, the process differs slightly since you can choose headline, descriptions, links, and even call-to-action buttons for each image or video in the carousel. You can also let the system to automatically choose the best performing post and show it first.
Example of HELLOHA’s carousel format:
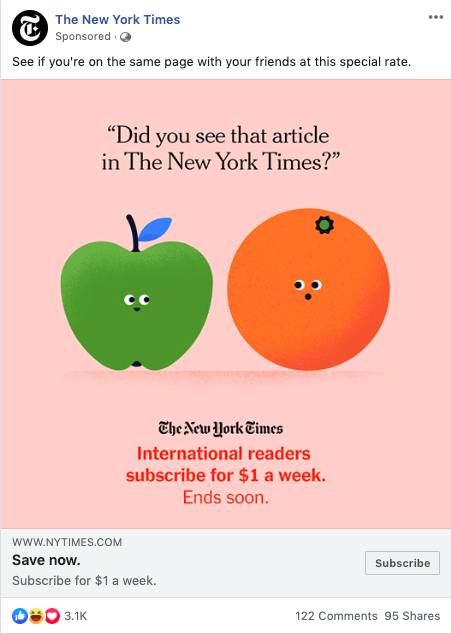
Example of New York times’ single image format:
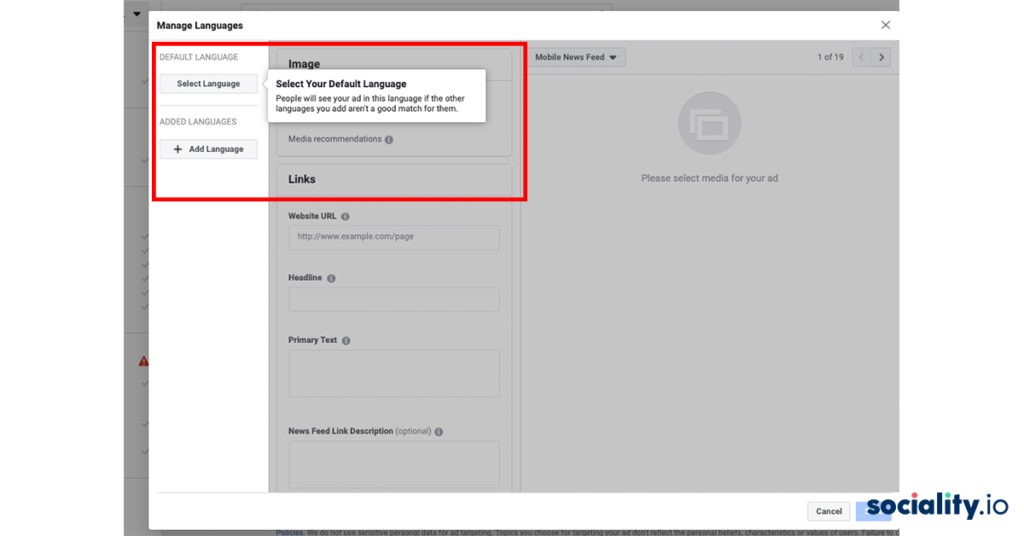
If your audience speaks different languages you won’t need to set a separate ad campaign. It can be done by clicking on “Create in different languages”.
To wrap it all up,
You’ve made it to the end. Hurray! Hopefully, by this point, you are able to launch your first Facebook Ad campaign. In this article, we looked at how to run ads without prior experience with the platform.
Takeouts from Facebook ads guide:
- What are you planning to achieve with Facebook ads?
- Who are the potential customers you are trying to reach?
- How your ads are going to look like? Prepare your visuals and copywriting beforehand.
- Choose your target audience wisely by benefiting from a comprehensive algorithm and Facebook data
- Set up your budget and bidding strategy. Facebook will always strive to get the best results for you, but it’s important to set limits within which it needs to optimize the advertising campaign.
I hope this helps you out! If you want to know about Twitter and TikTok Ads too, check this articles;

