Summarize this article via
Managing Instagram, and social media, in general, is a time-consuming task. From creating posts to managing direct messages, there seems to be not enough time for everything. And if you manage a social media team, your workload increases even more like 46% of people working in a team claim that working in a team affects their productivity.
It’s, therefore, no surprise that managers aim to increase the efficiency of their social media management team and automate their workflow. One of the ways to do so is by scheduling your content in advance.
Not only does this free up your team’s time, but it also improves collaboration between your graphic designers, copywriters, and social media marketing specialists.
In this post, I’ll talk about the importance of scheduling your Instagram content, how to schedule your content, and also give you tips to help you schedule your content better.
So without further ado, let’s begin.
How to schedule Instagram posts?
When it comes to automating the posting of your Instagram content, you can either use Facebook’s Creator Studio or use a social media management tool like Sociality.io.
I’ll cover how to use both of them in detail.
✨ Bonus article: Top 21 social media scheduler tools in 2022
Scheduling with Creator Studio
The creator studio was created with influencers in mind. The Instagram section in this tool allows you to manage and get insights from your Instagram posts on your computer.
You’ll be able to write captions, crop images, tag users and business partners, turn off comments, post to Facebook and Instagram, and so much more.
Here’s how to schedule Instagram posts with Creator Studio.
1. Link Instagram account to creator studio
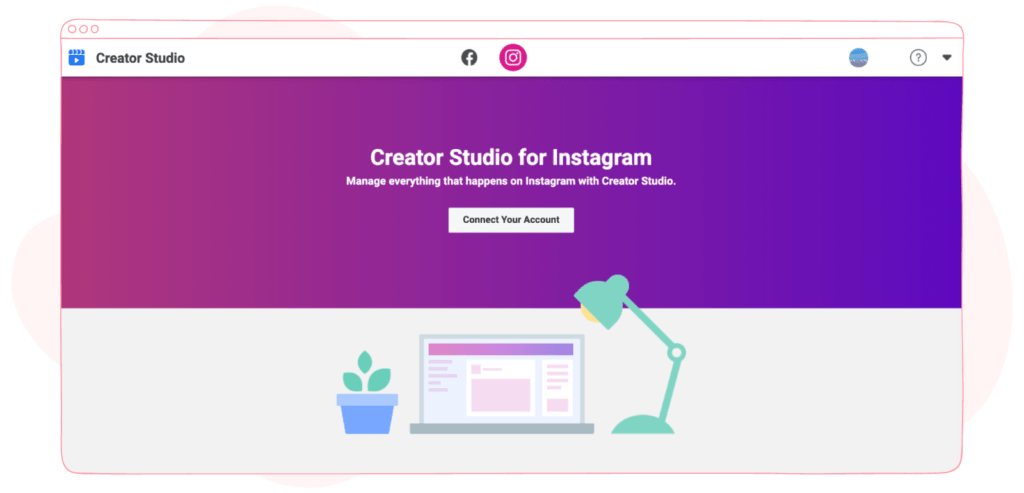
If you’ve not already linked your Instagram account to Facebook’s Creator Studio, this will be the first thing you do. On the home page, you’ll find a button prompting you to connect your account.
However, for this to be successful, you need to make sure that your Instagram account is connected to a Facebook page. Also, you need to have a business account. If you don’t, Instagram has made the process of switching to one very simple. If you need help with this process, check out this blog post.
2. Create a post
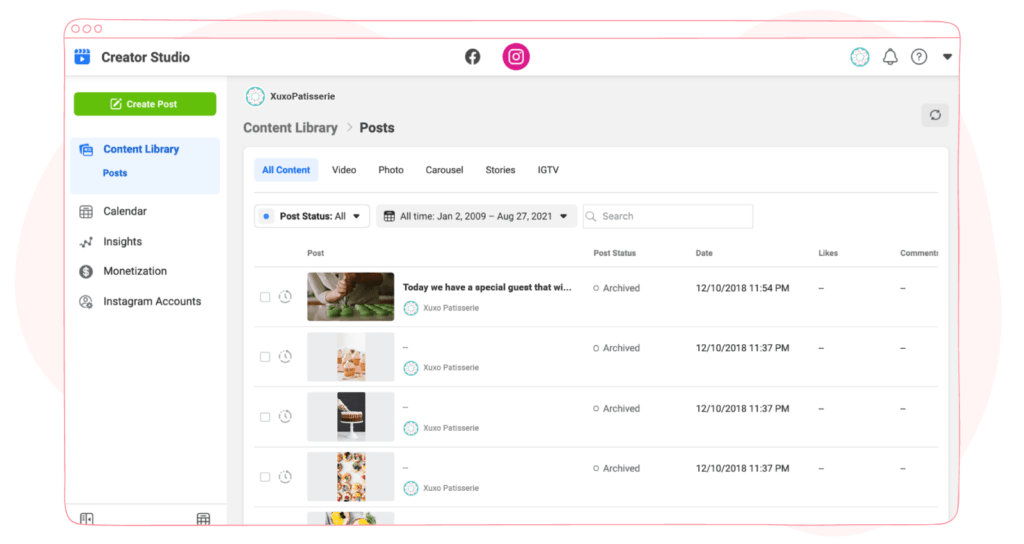
After linking your Instagram account, the next step is to start creating your post. Click on the “Create Post” button.
Note that you can only schedule posts for your Instagram feed and IGTV using Creator Studio. Support for Stories and Reels is not available yet.
To post content to your Instagram feed, click on “Instagram Feed”.
3. Add content
Now, it’s time to build your post. First, start with uploading your visuals. This could be a photo, a video, or more than one picture or video (carousel).
Click on the add content button and you’ll be able to upload content from your device or your Facebook page.
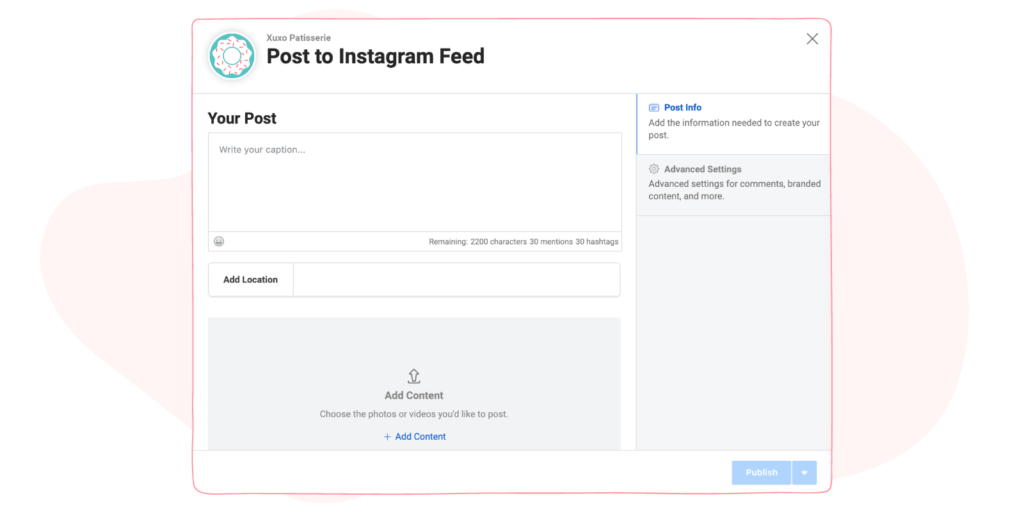
Now, it’s time to write a good caption for your post. Your captions can’t exceed 2200 characters so that’s something to take note of. You can also add up to 30 hashtags and tag up to 30 accounts.
Note: In the “Advanced Settings” option, you can decide to turn on or off comments for your post.

4. Schedule post
Now, the final step. Once your post is in order, you can decide to publish it immediately, schedule it to go out on a later date, or save it as a draft.

Pick “Schedule” and select the date you want it to be published. Your post will now be added to your calendar.
Scheduling using the social media management platform
Although the Creator Studio is a great tool for Instagram influencers and small businesses, it won’t suit your needs if you run a digital agency or a large social media team in an enterprise company.
In this case, the need for a third-party social media tool arises to manage multiple accounts under a single umbrella.
One such tool is Sociality.io.
Follow these steps to start scheduling your social media posts with Sociality.io.
1. Connect Instagram account to Sociality.io
After switching your Instagram creator account to a business account, the next step is to add it to a social media management platform, hopefully, Sociality.io.
Here’s how to link your Instagram account to Sociality.io’s platform.
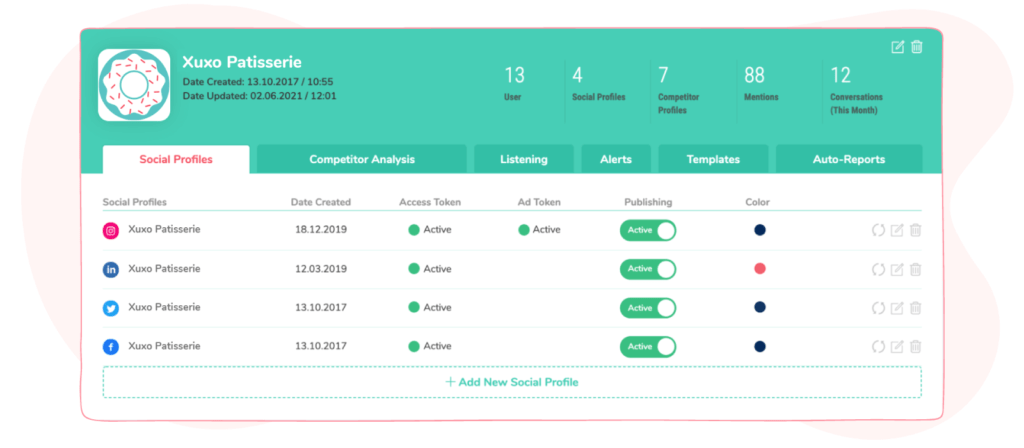
- After creating an account on Sociality.io, go to your profile and find the “Brands” section.
- Next, click on “Add New Social Profile”.
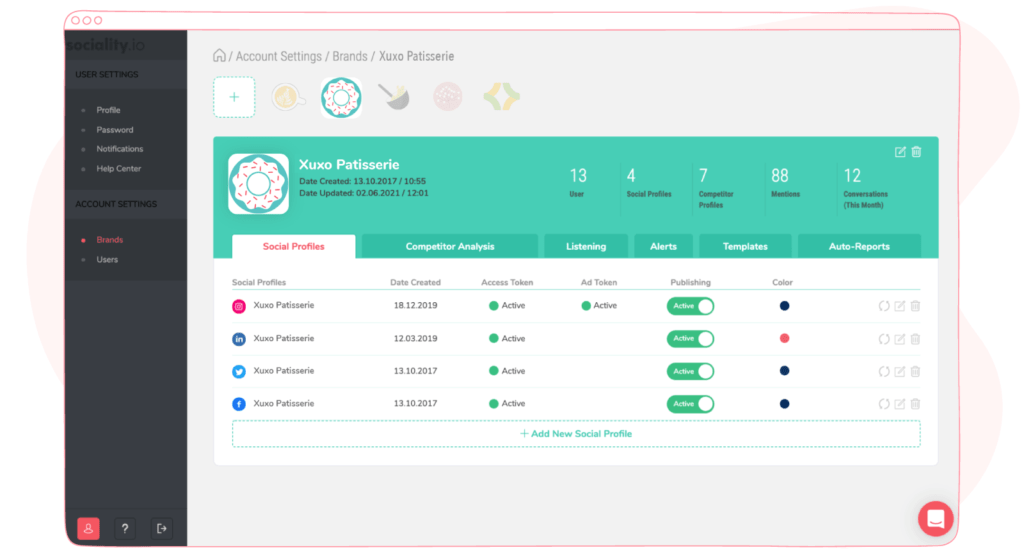
- A new window will open. From this window, choose the social media platform you want Sociality.io to connect with.
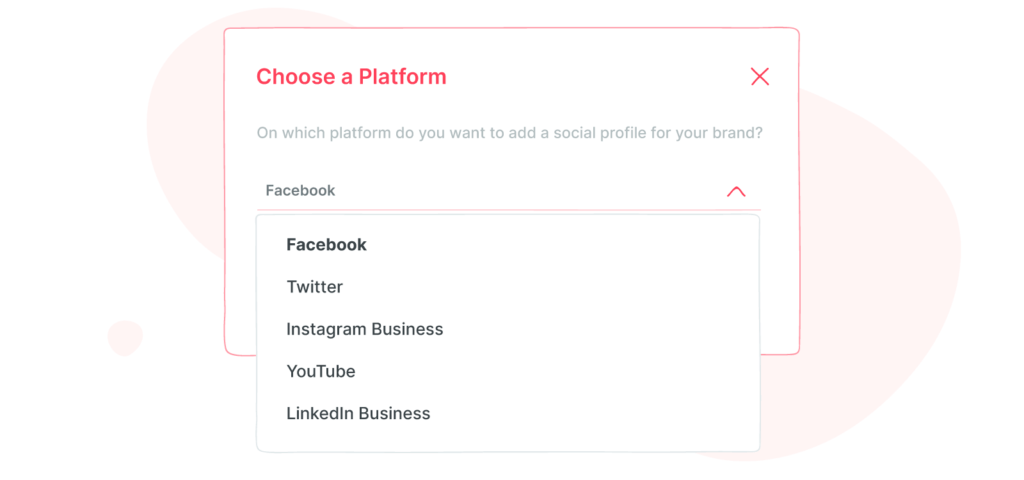
- Click on “Connect”. And then log in to the account.
- Finally, you edit your page by choosing a color and timezone, and then clicking “Save”.
2. Create your Instagram post
Congratulations, you’ve successfully added your Instagram account to Sociality.io. You can also create your Instagram posts right within the platform.
Here’s how to do this.
- On your Sociality.io dashboard, hit “Publish” and click on “Compose”.
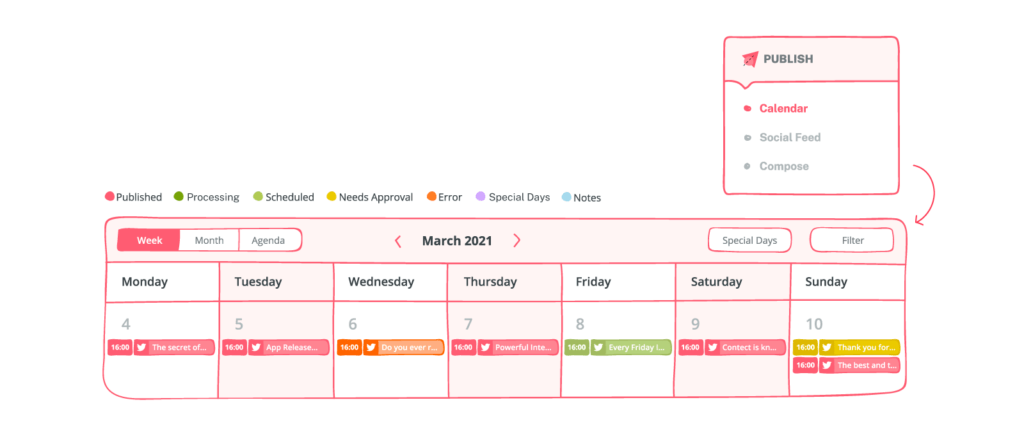
- Since you’ve only added your Instagram account, you can proceed with creating your Instagram posts. But if you’ve already added other social media accounts, you can choose the desired Instagram account.
- In the window that opens, you can specify the type of content you want to upload. You have the options of photo, video, carousel, and story.
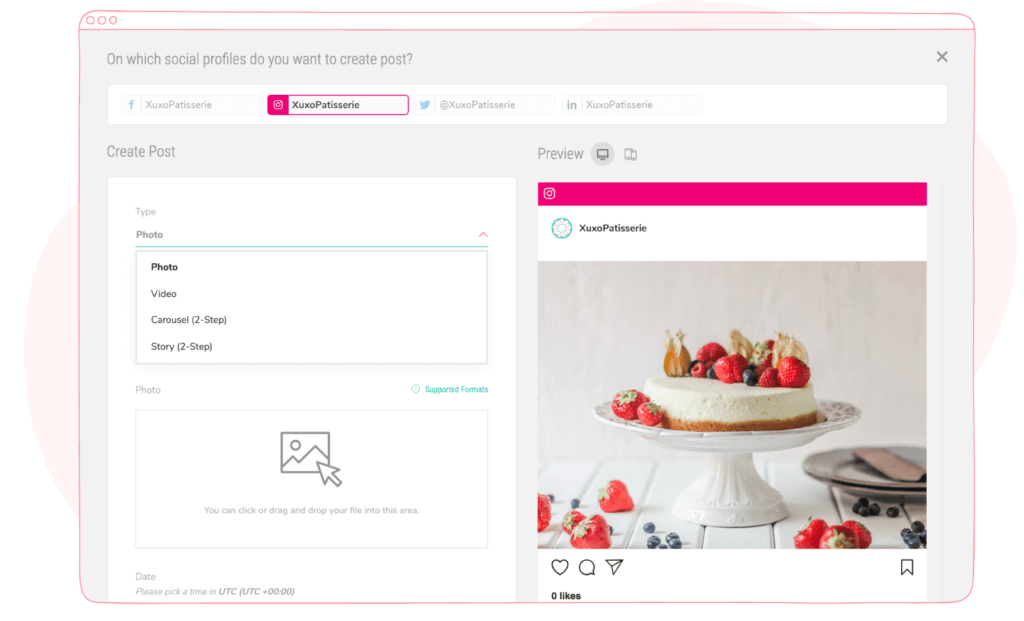
- Note that due to Instagram policies, third-party social media management platforms cannot publish carousel and stories directly to your account. But don’t worry, publishing time rolls around, you’ll get a notification that you can easily open on Instagram.
- Next, you should create your post caption.
- On the right side of the window, you can see the way your post would look on a desktop and a mobile device. If you feel satisfied with the way it looks you can decide to publish immediately or pick a date for it to go out.
- The post will instantly be added to your calendar.
Best tips for scheduling Instagram posts
You know what tools to use when scheduling your Instagram content now. But scheduling content is more than just hitting “publish” and waiting for your post to go live five days from now by 2 pm.
No.
There are things you should know and do to make sure that your scheduled posts have the highest chance of success.
Here are 4 tips that you should take note of.
1. Don’t schedule too far out
Scheduling Instagram posts helps you free up time by planning for the future. But how far into the future should you create content for?
You can always have one month of content planned out. Maybe even less if you are in a fast-paced industry. But do not misuse the flexibility scheduling posts in advance gives you by queueing up 6 months of content.
Problems arise unexpectedly. You do not want to drop a post that your customers think is insensitive, even though it was acceptable at the time of creation. Inside Sociality.io you can quickly deactivate publishing in case of PR emergencies.
2. Engage with your audience
It’s easy to forget about your Instagram followers when your content upload is on autopilot.
You can just go on to focus on other things and rest assured that your posts go out at the right time. But if you do this, your audience will begin to wonder if they are interacting with a human brand or a robot.
So you need to set best-performing aside time to engage with your audience. Reply to their comments. You can use Sociality.io engage module to make sure that you never miss a single interaction.
Showing up is the only way for you to build your Instagram community.
3. Take special care of your captions and hashtags
Every action you take must have a business impact. Even something as seemingly inconsequential as scheduling your posts.
One key aspect of the scheduling process that can easily be taken lightly is the captions and hashtags. Coming up with the perfect caption can be time-intensive sometimes, no doubt.
But we both agree that scheduling your posts gives you more time to organize your content. So why don’t you spend that time fine-tuning your caption?
A well-written caption expresses your brand. It allows you to humanize your brand. And perhaps most importantly, it helps you drive engagement. This is important because as of 2016, Instagram now decides how much reach a post has based on its engagement.
Here are a few tips for writing a great Instagram caption
- Write multiple drafts first before you decide on which one to us
- Start with your most important information as Instagram only shows the first X lines of your caption
- Use storytelling to give your brand personality
- Do not forget emojis
- Always include a call-to-action
- Use hashtags
4. Visualize Instagram feed
You might not know this but people care about the way your post looks next to one another.
This is why you should ensure that your customers have a consistent branding experience on your Instagram account.
Creating your Instagram posts in bulk gives you enough time to choose what content to create and post at a particular time, giving you a holistic view of your feed before it goes live.
Related article: How to style your Instagram grid layout: 4 planning tools
Conclusion
Automating scheduling processes is only the beginning of your social media marketing strategy. Analyzing performance and social KPIs is key to winning the engagement war in the competitive social media war.
🧁 Worth checking: Most important social media KPIs to track
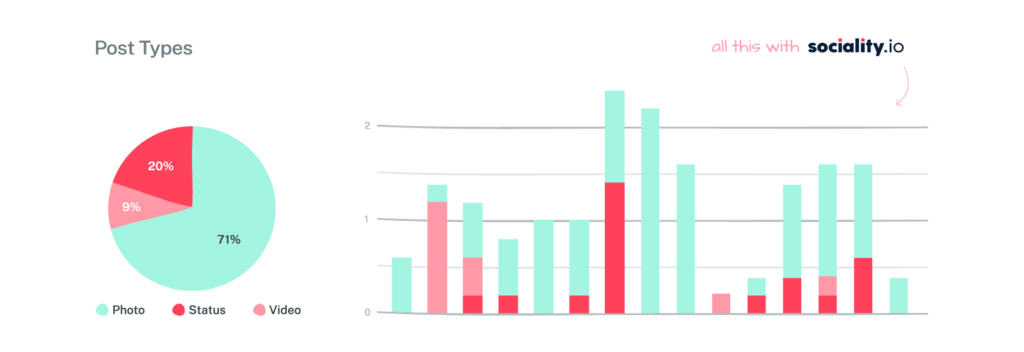
Once you set up your Sociality.io account, you’ll be able to uncover your overall Instagram performance. You’ll see your best-performing content, your posts’ engagement, and their reach. This way you’ll be able to understand what works and what doesn’t.
And that’s not all. You’ll also be joining a community of over 2000 marketers who use Sociality.io to manage their social media accounts.
You can start your 14-day free trial here, no credit card is required.
